Recently, I was working on a video project where I made an intro video for a friend’s YouTube channel. And he wanted a little spice in the video, but the default fonts or the fonts available in the asset store were different from what he wanted for the intro video. It looked boring. So I decided to import a custom font that he liked.
Kinemaster is excellent because it lets users add custom fonts. I was able to download and install the font my friend wanted. Finding the font online took a little digging, but it was worth it.
Today, I’ll show you how to add custom fonts in Kinemaster and tell you where you can get the fonts for free. Also, remember that importing fonts on iOS differs from doing so on Android. Find out by reading on.
Table of Contents
ToggleWhat is Kinemaster Custom Font?
“Kinemaster Custom Font” refers to fonts downloaded from somewhere other than the Kinemaster app and imported into it. It lets us choose the typeface we want for our video project. The Kinemaster custom font is one that you download and install yourself instead of using the default fonts that come with the app or the fonts from the asset store.
Custom fonts give you more control over how the text in your Kinemaster projects looks and is formatted. Adding your own fonts to your videos gives them a unique look and makes them stand out.
Where to Download Custom Fonts for Kinemaster?
There are many websites where you can get free custom fonts. I’ve listed below the eight most popular and best free font sites that many Kine users use.
If you couldn’t find the font you were looking for on the site above, I’d suggest finding out the font’s name and searching for it on Google. For me, it always worked.
How to Add Fonts in Kinemaster?
Before we begin, you must know you can install custom fonts on Android from the Kinemaster app. But you need a third-party app to import it on an iOS device.
Import Font without App on Android
To add custom fonts to Kinemaster on Android without using an app, you will need to follow these steps:
- Download the fonts you want to use in the Kinemaster project. You can get them from any of the sites listed above.
- Most font files are compressed in a .zip format, so you may need to “extract” them before you try to import them. You can go without extracting if the font file is already in OTF or TTF extension.
- Once the extracted font file is saved on your device, open the Kinemaster app and create a new project. Or you can open a project that you already have it.
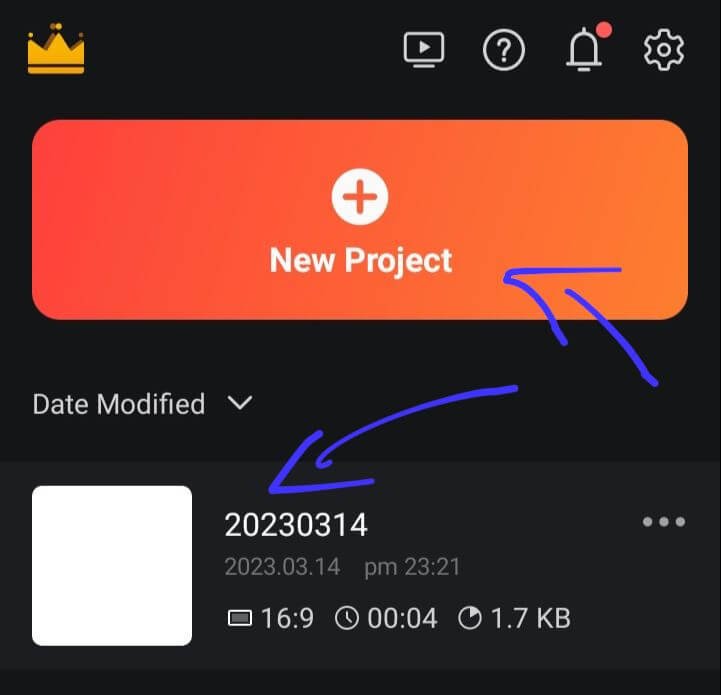
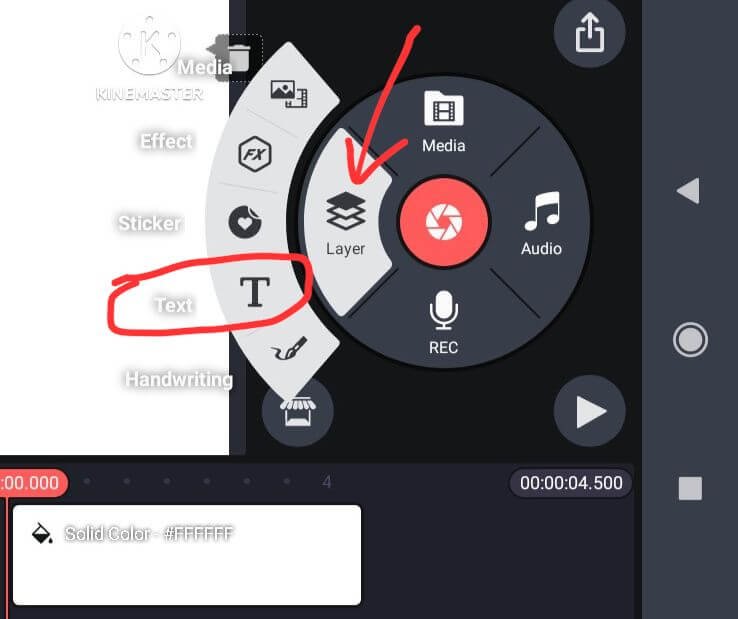
- Add a media file, then click on the layer and add the text layer.
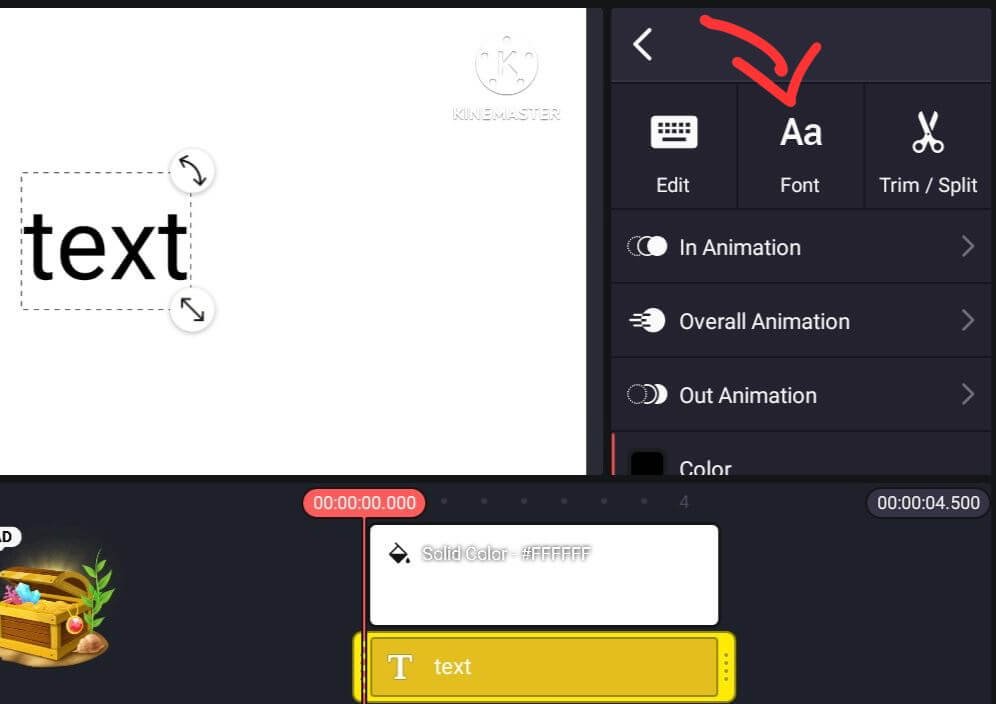
- Select the text layer and click on the font.
- Then click on the “+” icon at the top right corner.
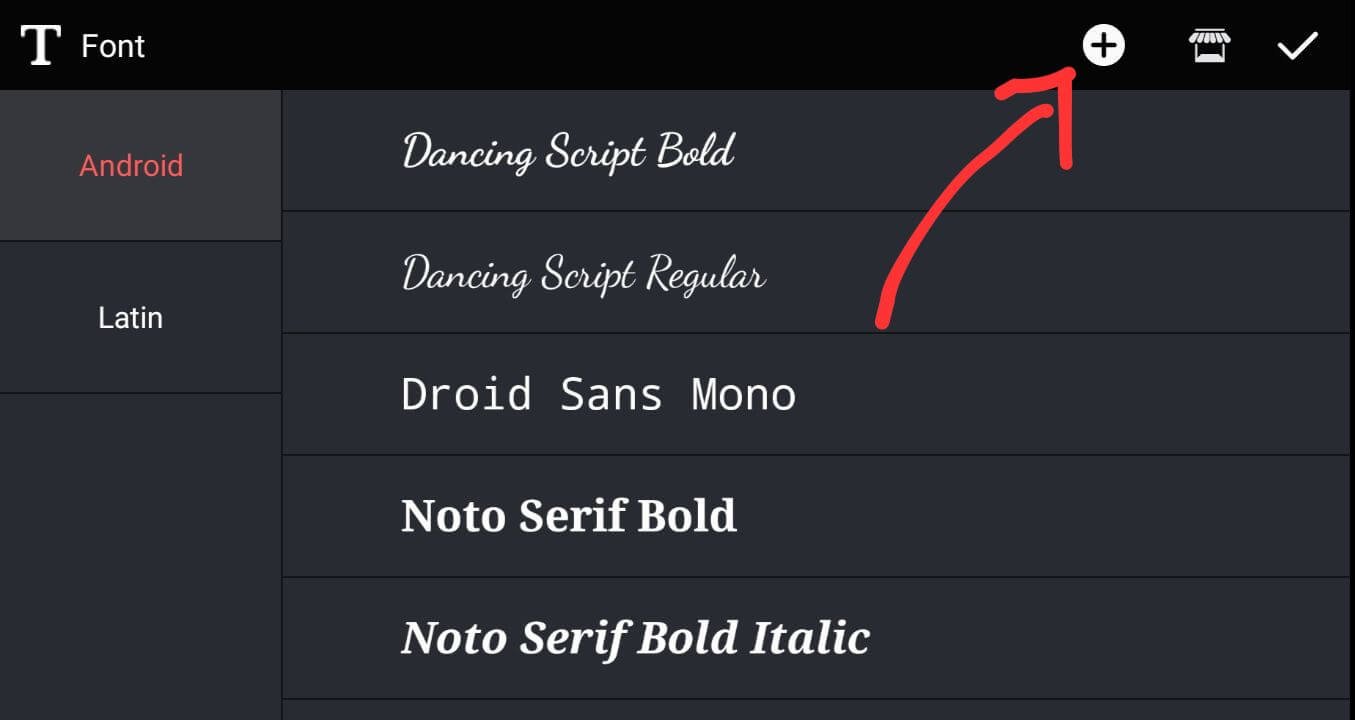
- Now, Locate your file with the .otf or .ttf extension and select the font you want to import.
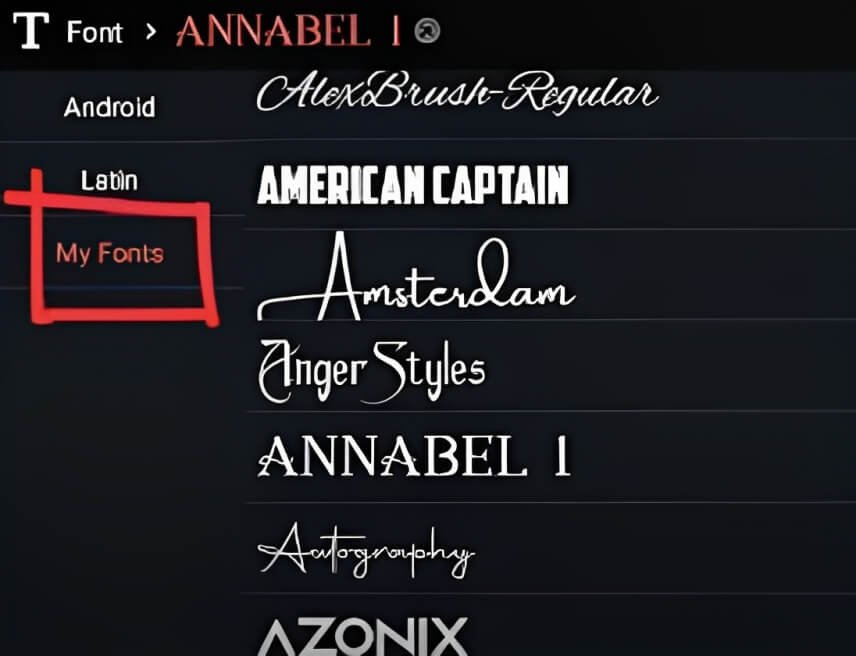
- After the font is imported, You will see a new option called “My fonts” in the fonts section, where you will see all the fonts you imported. You can choose the font and use it right away.
Install Custom Font using an App on iPhone
While adding a custom font on Android is easier, installing the font on iPhone requires extra effort. Don’t worry about it; it’s not that complicated. All you need is a font app.
- Get the ifont app from the App Store and install it. There are other apps that could be used, but since Kinemaster suggests the ifont app, we will use that.
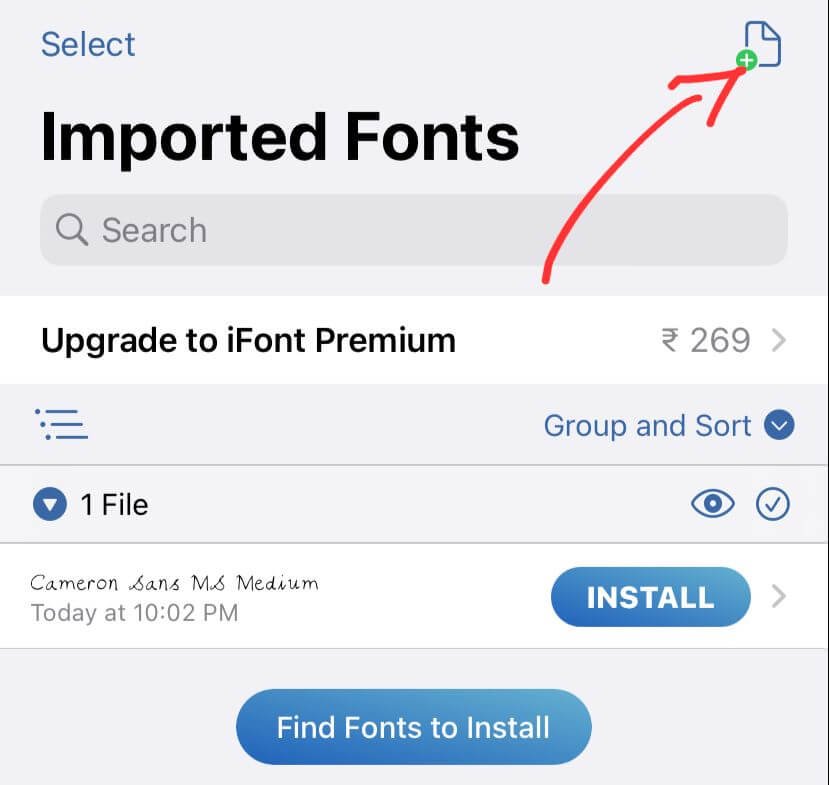
- Open the ifont app and click on the import icon in the top right corner of the imported tab.
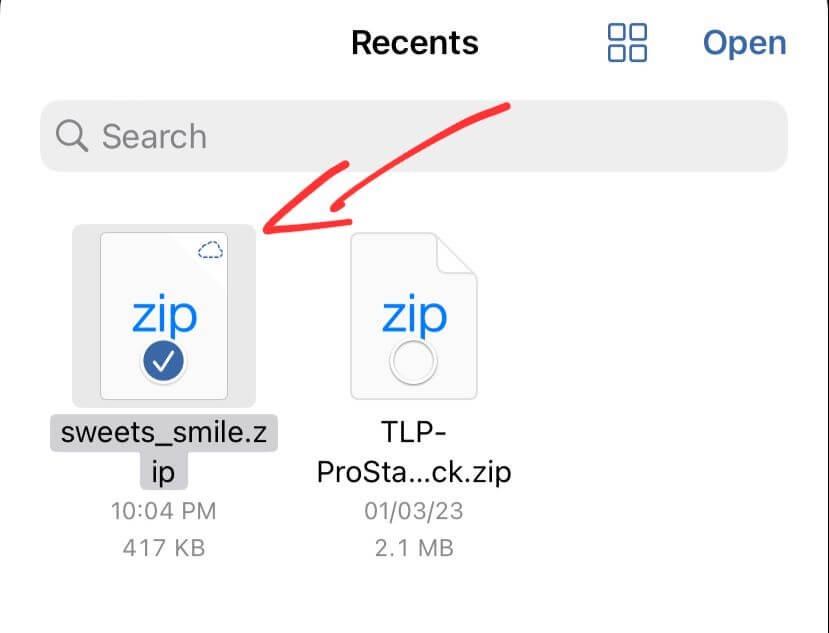
- Find the font file you downloaded and click on it. On iPhone, you don’t have to extract the zip file. The app comes with a .zip extractor that does the job.
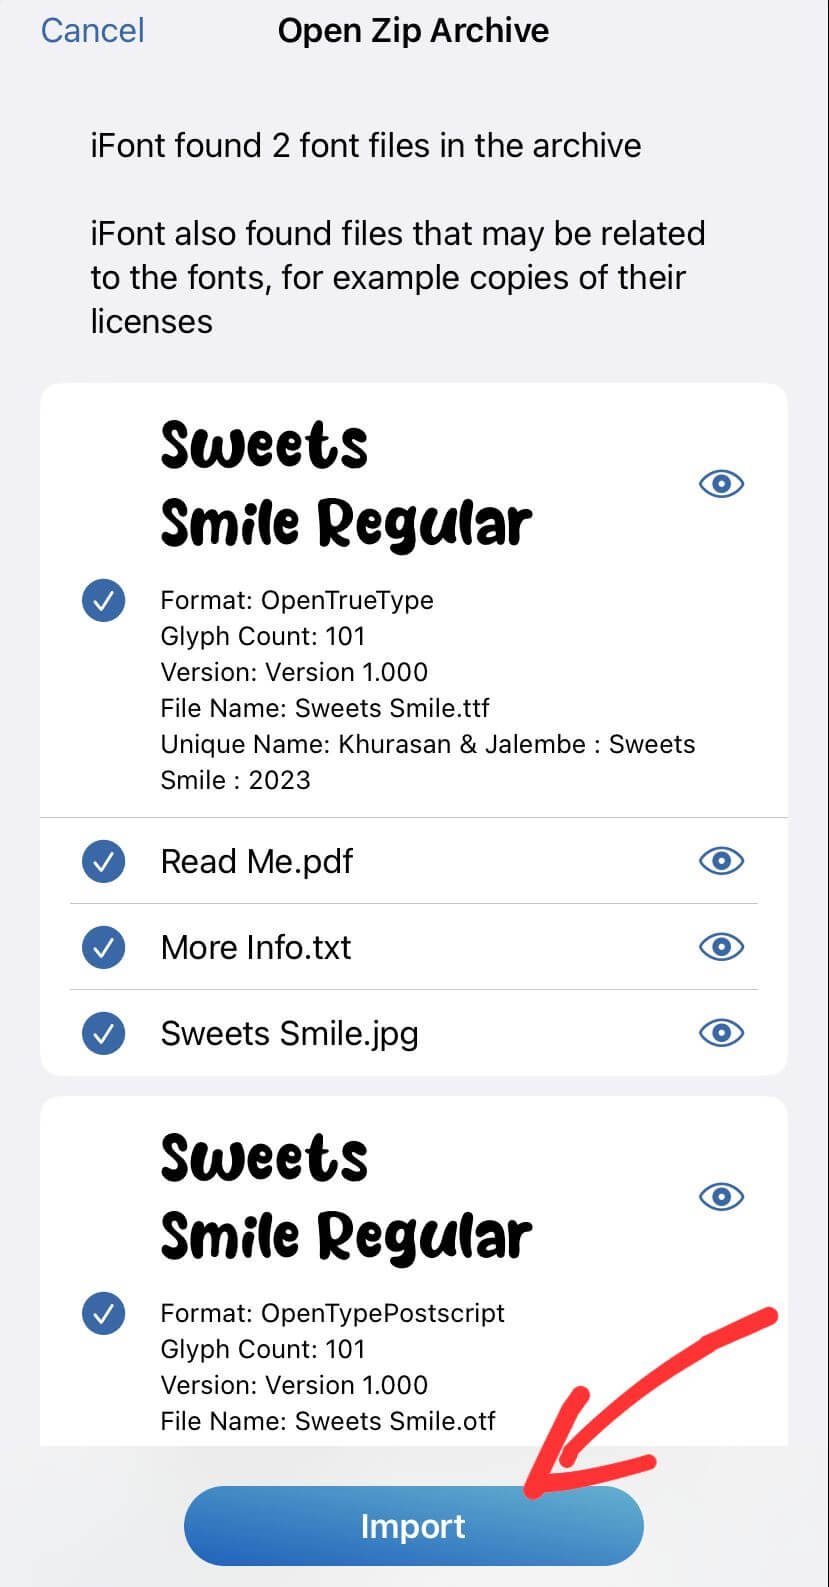
- Click the “Import” button. The app will automatically unzip the file and install the font.
- The font is now moved into the ifont app. You must install the font to use it on Kinemaster, so click the “Install” button.
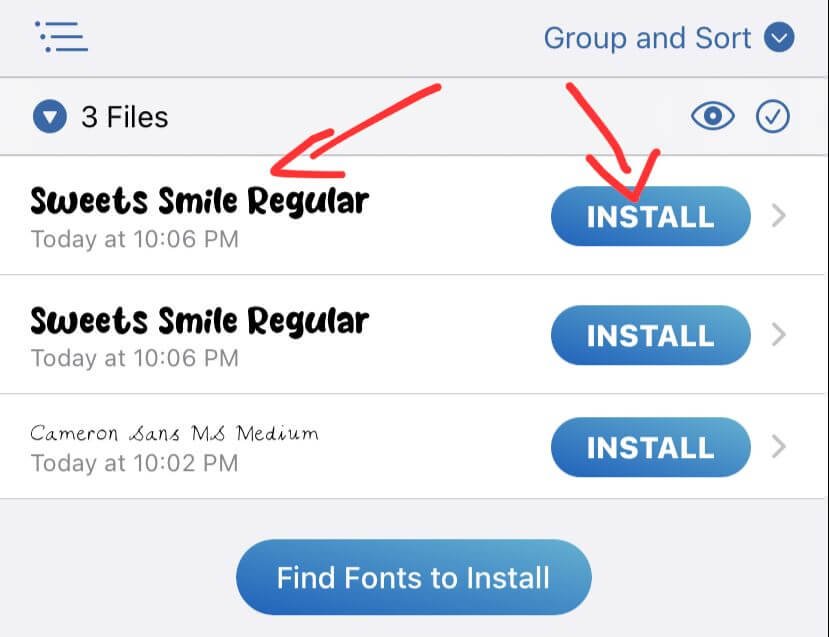
- Click “continue.”
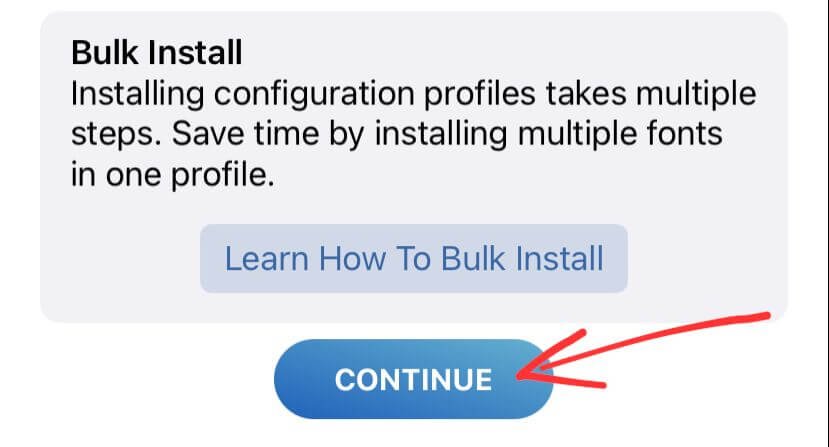
- You must download a configuration profile, so click “allow.” The profile only needs to be set up once.
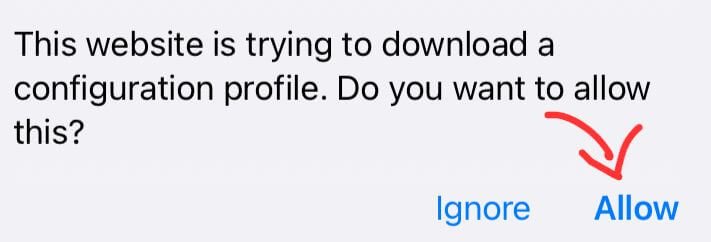
- Click “open settings” to set up the profile configuration.
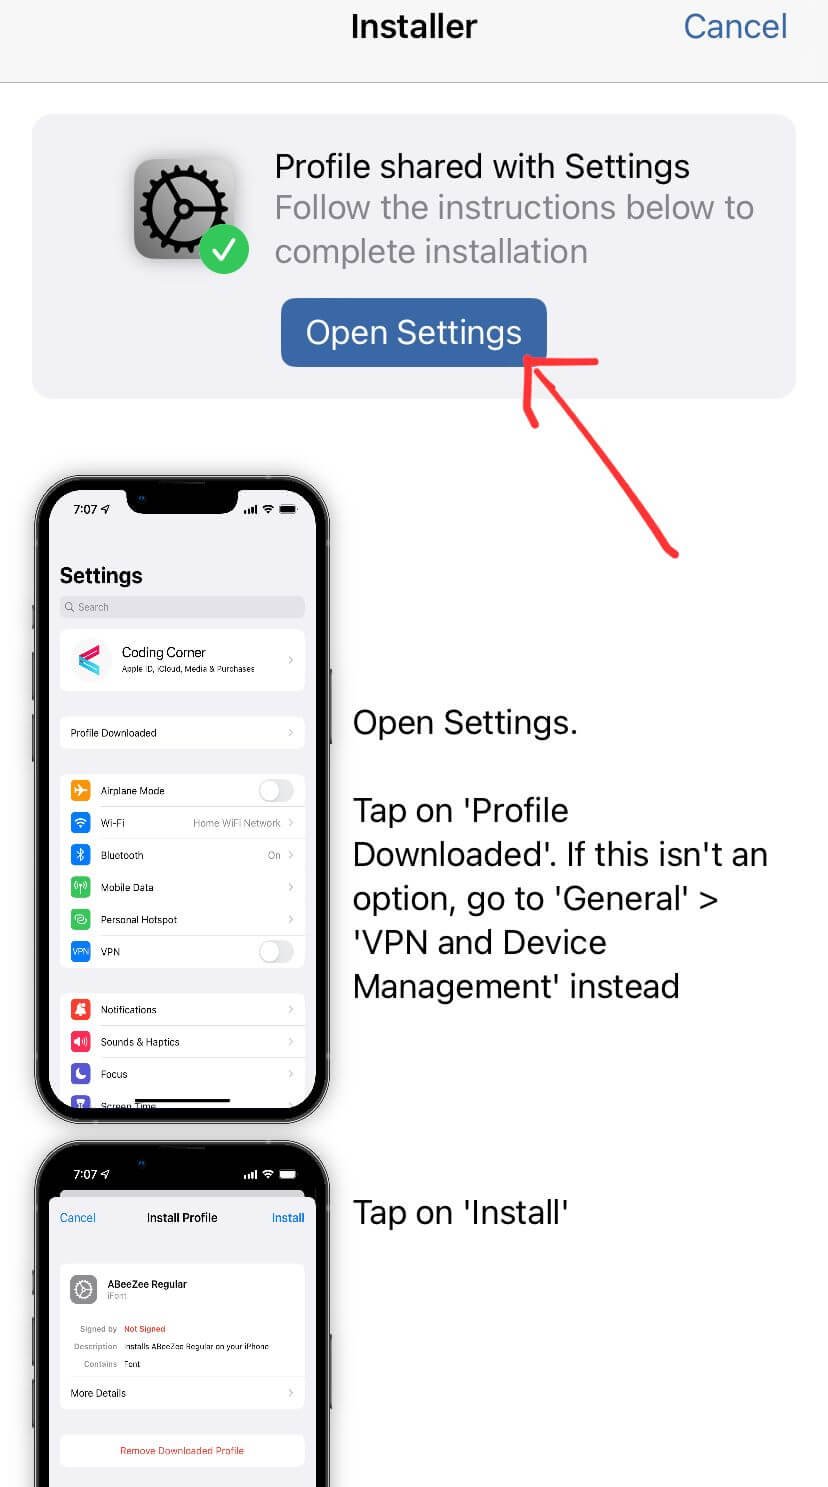
- You’ll be taken to your device’s settings. Click on “Profile downloaded” there.
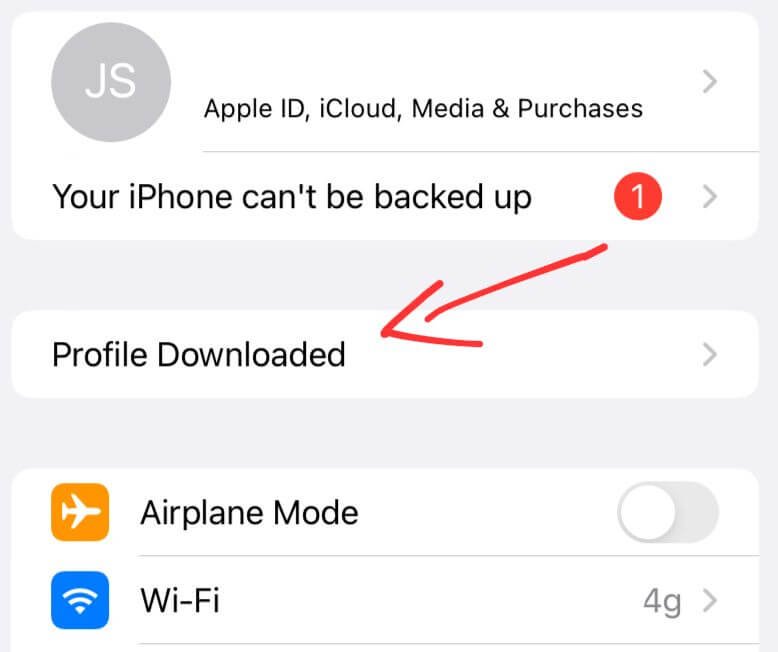
- Click on “Install.”
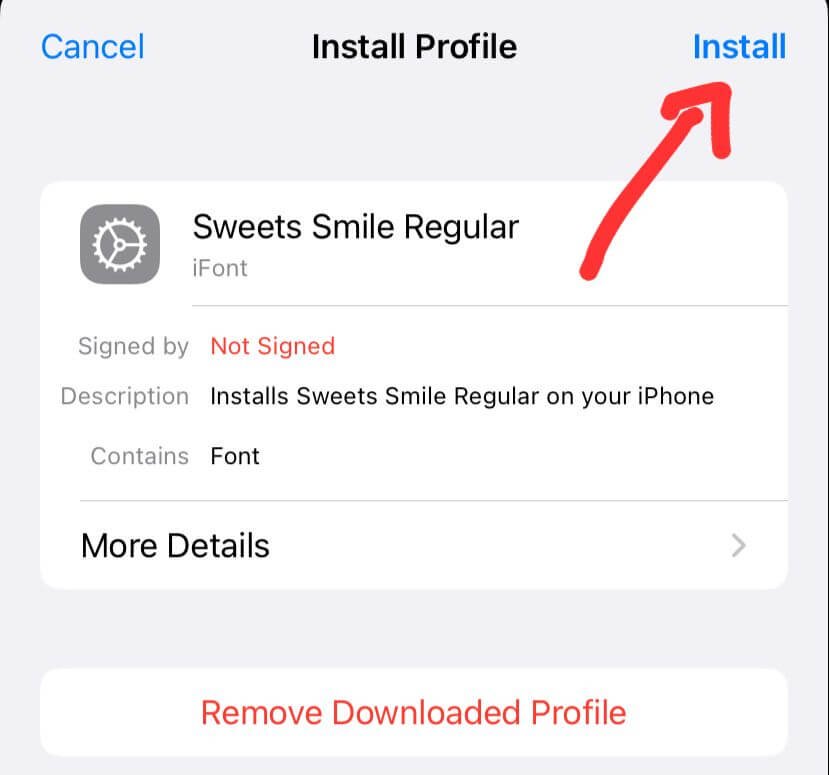
- Type in your passcode to prove that it’s you.
- Finally, click “Install” again, even if it says ‘profile is not signed’ to finish the profile configuration.
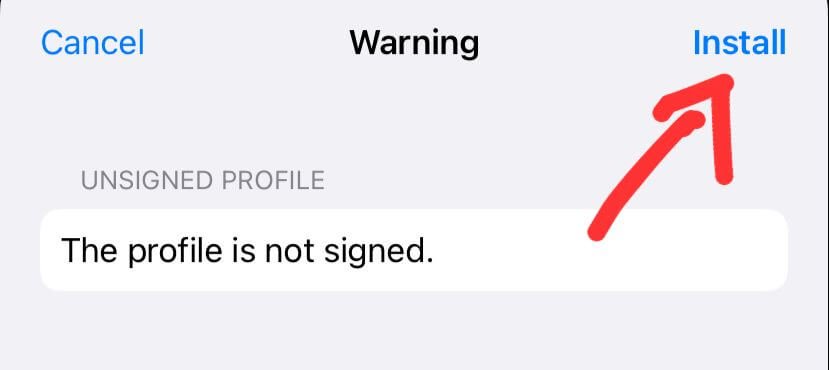
Your font is now added to your Kinemaster app. You can open the Kinemaster app and go to the fonts section, where the installed font will be listed.
Even though this step may seem confusing, it is easy to do once you have finished the profile configuration.
You can also use the “Font Finder” section of the ifont app to find fonts from the app.
Conclusion
Adding custom fonts to your Kinemaster projects can help your content stand out and look more professional. With the easy steps in this article, you can now add custom fonts to your videos on Android and iOS devices. I also gave you a list of the best sites to download fonts for free. So why use the default fonts when you can use custom fonts to make your content unique? Start exploring today and add a special touch to your videos.


ashmansam812@gmail.com